
USB Over GPIOP
Overview
USB (Universal Serial Bus) is a standard for data transfer and power delivery. While traditionally handled by dedicated USB controllers, some embedded systems may require USB functionality over GPIO (General Purpose Input/Output) for custom implementations.
Mecha Comet supports USB over GPIO, allowing you to use GPIO pins to emulate USB communication. This can be useful for applications where a full USB controller is not available or when you want to create a custom USB interface.
How USB Works Over GPIO
USB communication is based on differential signaling, using two data lines: D+ (USB DP) and D- (USB DM). Implementing USB over GPIO requires software emulation of these signals. Since GPIOs are not designed for high-speed differential signaling, this method is mainly suitable for low-speed devices such as HID peripherals (keyboard, mouse) and simple data communication applications.
Key Challenges:
- GPIOs lack native USB signaling support, requiring bit-banging techniques.
- Timing constraints make high-speed USB infeasible.
- Some devices may require additional pull-up resistors for proper identification.
Pin Configuration
The Mecha Comet GPIO pins used for USB communication are as follows:
| GPIO Pin | USB Function | USB Connector Pin |
|---|---|---|
| 5V | VBUS | Pin 1 |
| GND | Ground | Pin 4 |
| GPIO X | D- (USB DM) | Pin 2 |
| GPIO Y | D+ (USB DP) | Pin 3 |
Implementing USB Over GPIO
Hardware Setup
- Connect the GPIO pins to the USB connector according to the pin configuration table.
- Ensure proper power supply to the USB device through the VBUS pin.
- Use pull-up resistors on the D+ line if required by the USB device.
- Ensure that the ground (GND) pin is connected to the common ground of the system.
Here is example of USB Female to 2.54mm Breakout Board
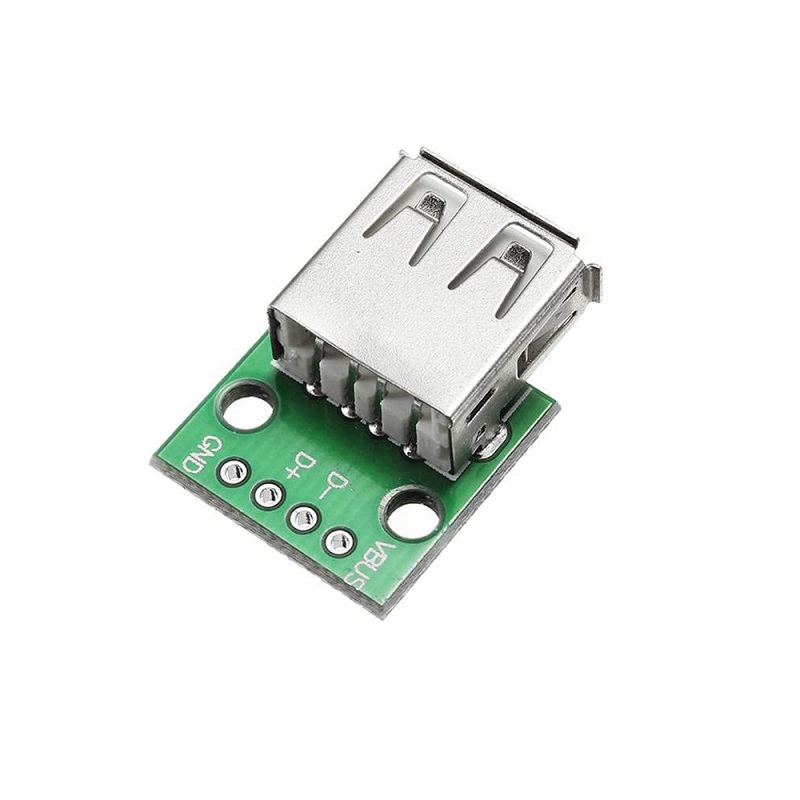
You can use this breakout board to connect USB devices to the GPIO pins. The board converts the USB signals to GPIO signals, allowing you to interface with USB devices using GPIO pins.
You just need to connect the D+ and D- pins of the USB connector to the corresponding GPIO pins. The VBUS pin provides power to the USB device, and the GND pin is connected to the common ground. affect that you can attach USB devices to the breakout board attach to the Mecha Comet device and communicate with them using USB protocols.
Detection of the USB Device
Once the hardware setup is complete, you can use the following steps to detect and communicate with the USB device:
- Power on the Mecha Comet device and ensure that the USB device is connected over gpio.
- Check the USB device detection using the following command:
$ lsusb - Verify the USB device is listed in the output. If the device is detected, you can proceed with communication.
Use Cases
- Custom USB Devices: Create custom USB devices using GPIO pins for specific applications.
- Low-Speed USB Communication: Implement low-speed USB communication for HID devices like keyboards and mice.
- Prototyping: Use GPIO pins for quick prototyping of USB devices without dedicated USB controllers.
Real-World Use Cases
USB HID Devices (Keyboards, Mice)
- Implementing basic keyboard/mouse functions with GPIO-controlled USB.
- Useful for minimal embedded systems that lack dedicated USB controllers.
Custom USB Communication
- Using GPIOs to simulate low-speed USB for device-to-device communication.
- Helpful for debugging or custom-built USB peripherals.
Power Management for USB Devices
- Controlling USB VBUS power via GPIO, allowing software-driven power cycling.
While USB over GPIO has limitations in speed and stability, it enables USB functionality on hardware lacking dedicated controllers. The provided examples and wiring guidelines allow users to implement USB communication for custom applications like HID devices, low-speed data transfer, and power management.
For advanced use cases, consider dedicated USB controllers or microcontrollers with native USB support.