
Building the Kernel from Source
This guide provides a step-by-step process for building the Mecha Comet kernel from source. It covers setting up a cross-compilation environment, configuring the kernel, compiling it, and packaging the kernel image, device tree, and modules for installation.
1. Set Up the Cross-Build Environment
Since the target device uses an ARM64 architecture, we need a cross-compilation toolchain for your host machine.
On an Ubuntu-based system, install the necessary toolchain:
$ sudo apt-get install gcc-aarch64-linux-gnu
Then, set up environment variables:
$ export ARCH=arm64
$ export CROSS_COMPILE=/usr/bin/aarch64-linux-gnu-
These variables ensure that the correct architecture and compiler are used for the build process.
2. Clone the Kernel Source Repository
clone the kernel source repository from GitHub to your host machine:
$ git clone https://github.com/chiragp-mecha/linux-imx
$ cd linux-imx
This repository contains the Linux kernel source code with Mecha-Comet-specific configurations and patches.
3. Configure the Kernel
On your host machine, copy the default kernel configuration for the Mecha-Comet platform:
$ cp arch/arm64/configs/mecha_v8_defconfig .config
You can modify the configuration using:
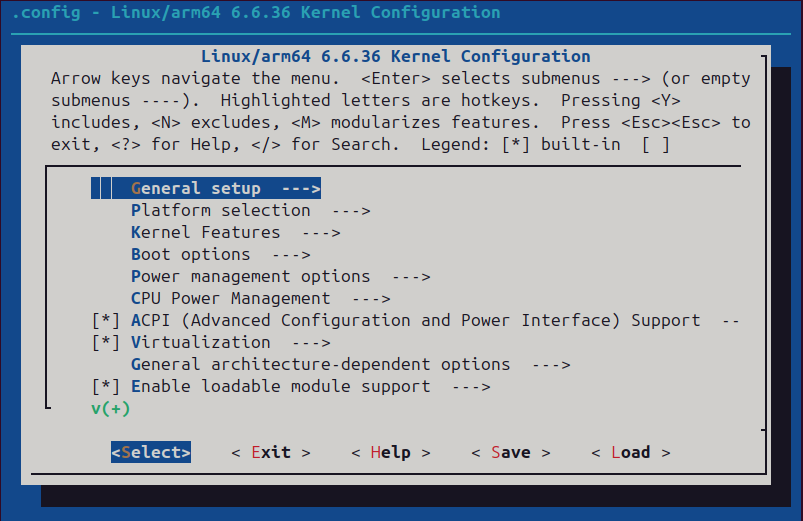
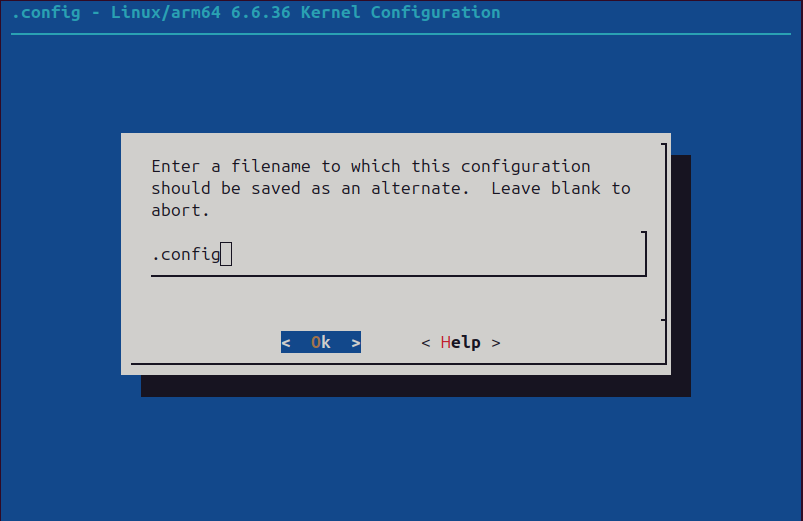
$ make menuconfig
This command opens a GUI-based configuration menu. Once the changes are made, save and exit.
4. Build the Kernel
Compile the kernel using multiple CPU cores for faster execution:
$ make -j $(nproc)
Once the build completes, the key output files are:
- Kernel Image:
arch/arm64/boot/Image - Device Tree Blob (DTB):
arch/arm64/boot/dts/freescale/imx8mm-mecha-comet-m-gen1.dtb
5. Create a Debian Package for the Kernel and Modules
Using deb-pkg
To create a Debian package that includes the kernel image, device tree, and modules, run:
$ make deb-pkg -j $(nproc)
This generates .deb packages for easy installation.
6. Install the Kernel on the Target Device
Transfer the Kernel Package
After building the kernel package, transfer the .deb files to the Mecha-Comet device using scp:
$ scp ../linux-image-*.deb user@mecha-comet:/tmp/
Replace user@mecha-comet with the actual username and IP address of your device.
Install the Kernel Package
On the Mecha-Comet device, install the package using dpkg:
$ sudo dpkg -i /tmp/linux-image-*.deb
If any dependency issues arise, resolve them using:
$ sudo apt-get -f install
Reboot the Device
Once installed, reboot the device to apply the changes:
$ sudo reboot
After rebooting, verify that the new kernel is running:
$ uname -r
This should display the installed kernel version.
7. Important Notes
- Ensure the kernel image and modules installed on the target device match the same source revision (
SRC-REV) to avoid compatibility issues. - If changes are made to the kernel configuration, rebuild both the kernel and the modules before installation.
- The target device must have enough storage and the required dependencies installed for smooth installation.
This guide serves as a reference for building, configuring, and deploying the Mecha Comet kernel efficiently.
Building the Kernel Using Mecha-Make
To simplify the kernel build process, we have developed mecha-make, a build system using Nu Shell. This tool automates kernel compilation, enabling rapid development with just a few commands.
Prerequisites
On the Host Machine
- Download
mecha-makefrom the Mecha-Make GitHub Repository. - Install Nu Shell (built with Rust). If you encounter errors, ensure you have the latest version of Rust installed.
- Install the necessary dependencies:
$ sudo apt-get update && sudo apt-get install -y sudo curl git rsync cpio
Steps to Build the Kernel
On the Host Machine
- Clone the Linux kernel source:
$ git clone https://github.com/chiragp-mecha/linux-imx
$ cd linux-imx
- Create a build directory:
$ mkdir -p kernel-build
- Execute the build script using Nu Shell:
$ nu build.nu mecha-comet-gen1 ../kernel-build
- Once the build completes, check the output files in:
$ ls -laR kernel-build/deploy
Installing the Kernel on the Target Device
Transfer the Kernel Package
After building the kernel, transfer the output files to the Mecha-Comet device using scp:
$ scp -r kernel-build/deploy user@mecha-comet:/tmp/
Replace user@mecha-comet with the actual username and IP address of your device.
Install the Kernel on the Target Device
Log in to the Mecha-Comet device and install the kernel:
$ cd /tmp/deploy
$ sudo dpkg -i linux-image-*.deb
If any dependency issues arise, resolve them using:
$ sudo apt-get -f install
Reboot and Verify Installation
Reboot the device to apply the changes:
$ sudo reboot
After rebooting, verify that the new kernel is running:
$ uname -r
This should display the installed kernel version.
This method provides a structured and automated approach to kernel building, separating host and target actions to avoid confusion and streamline the process.
Conclusion
This guide covered the process of building, packaging, and installing the Mecha-Comet kernel. By following these steps, you can ensure that your device runs a custom-built kernel tailored to its needs.