
Connecting via Serial Console
Sometimes, your Mecha Comet just won't boot. Other times, it boots but behaves strangely-and when SSH access isn't an option, troubleshooting becomes even more challenging.
Fortunately, the Mecha Comet has a built-in Serial Console that you can access using a UART cable. This can be a Hail Mary solution when SSH or any other form of connectivity fails.
What is the UART
Embedded systems often need communication with external devices for data transfer, command exchange, or debugging. One of the most common interfaces for this is the Universal Asynchronous Receiver/Transmitter (UART). When a board reaches the software or firmware team, the first priority is usually setting up the debug console.
UART (Universal Asynchronous Receiver-Transmitter) supports various serial communication protocols for transmitting and receiving data. In serial communication, data is sent bit by bit over a single wire. For two-way communication, two wires are used—one for transmission and one for reception.
Simply Embedded has a great overview of UART if you want to learn more.
Option 1: Connect the USB to UART Cable
You will need a USB-to-UART cable to connect to the Mecha Comet. you can check the link for ref Amazon link
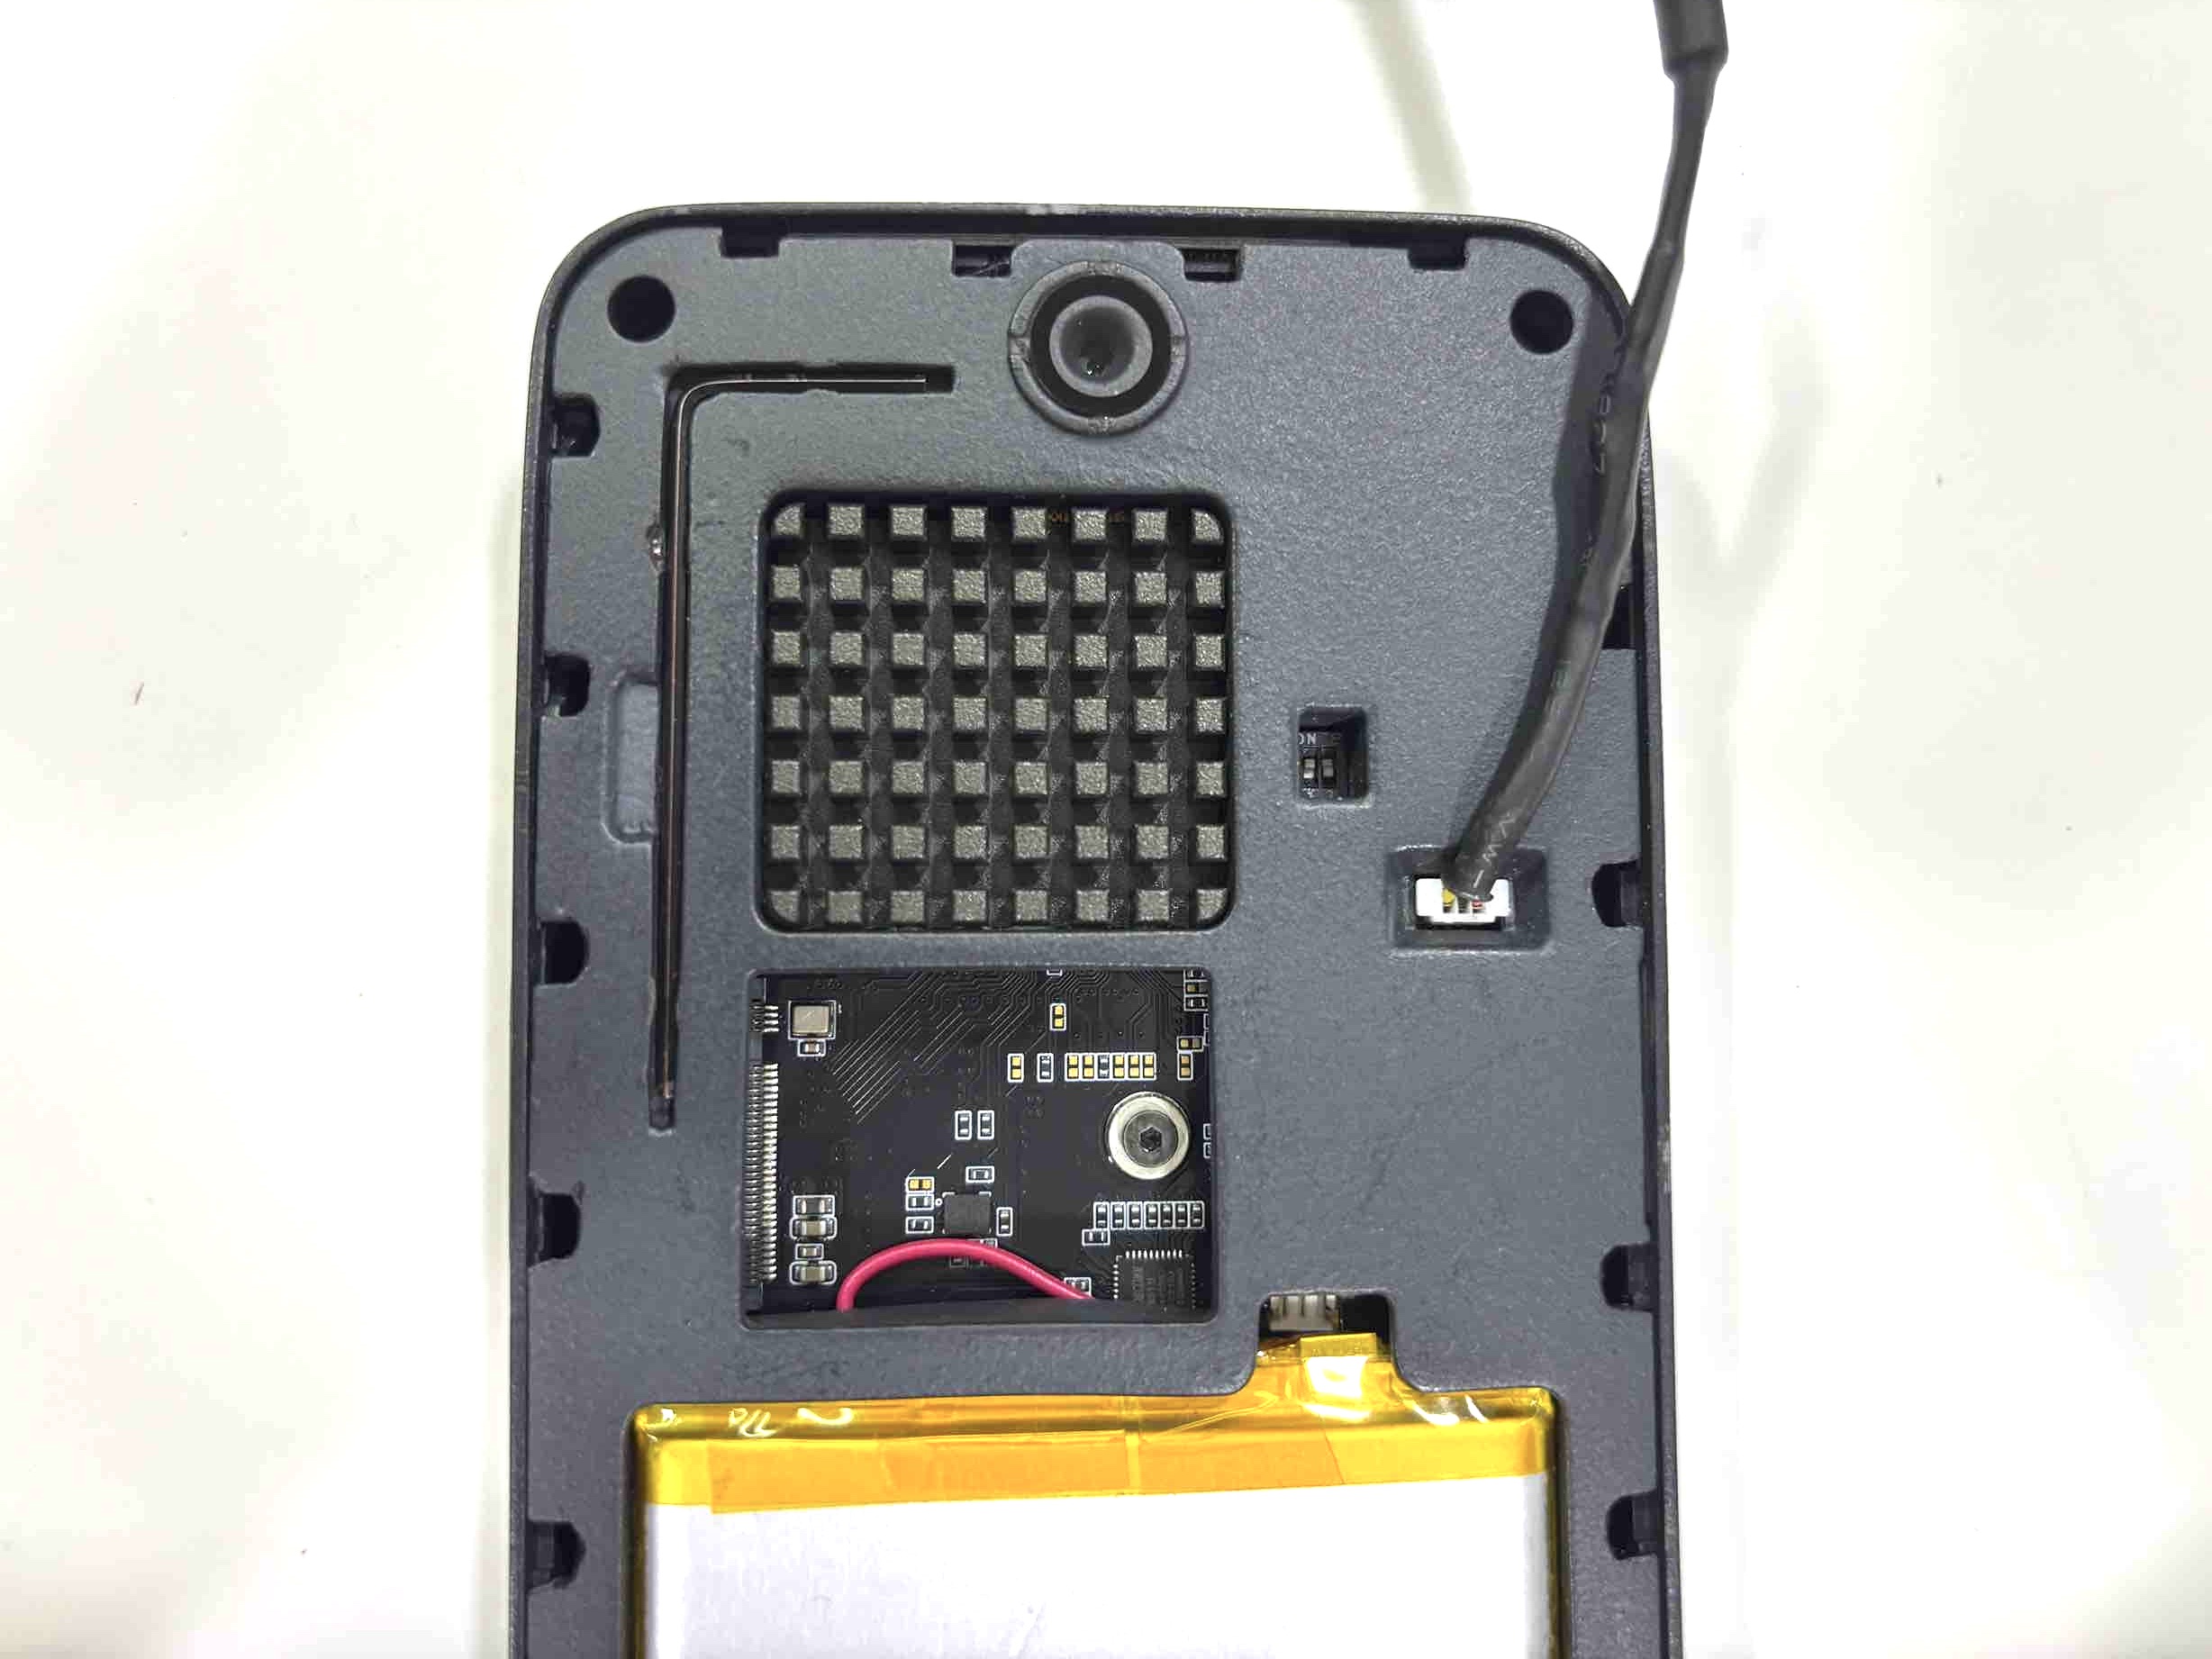
For Mecha Comet, the UART port is located on the backside. Simply remove the back cover to access it.
Option 2: Connect USB-C Cable (Breakout Extension)
You will need a USB-C cable to connect to the Mecha Comet. you can check the link for ref Amazon link
The default username and password for your Mecha Comet is mecha.
Connect to Serial Console on Linux
Open the Terminal on your Linux machine.
Get list the connected devices. Your UART bridge will appear as something like /dev/ttyUSB0.
$ sudo dmesg | grep tty
  [90797.684048] usb 5-2: cp210x converter now attached to ttyUSB0
  [95515.675293] cp210x ttyUSB0: cp210x converter now disconnected from ttyUSB0
  [97068.662492] usb 5-1: cp210x converter now attached to ttyUSB0
Connect to your device using the screen command, followed by the device path and the baud rate, which is typically 115200.
$ sudo screen /dev/ttyUSB0 115200
Once you start the Mecha Comet, you should see the boot logs on your linux terminal. It will ask you to the provide your Comet login credentials.
Welcome Mechanix V1.1
comet login: mecha
Password:
If everything is done correctly, you should now be connected to the device via the UART cable. 🎉
Connect to Serial Console on MacOS
Open the Terminal on your Mac.
Get the list of the connected devices.
$ ls /dev/cu.*

/dev/cu.Bluetooth-Incoming-Port /dev/cu.usbserial-XXXX
Identify the device that represents your UART bridge. It should look something like /dev/cu.usbserial-XXXX.
Connect to the device using the screen command followed by the device path and the baud rate i.e. 115200.
$ screen /dev/cu.usbserial-XXXX 115200
Once you start the Mecha Comet, you should see the boot logs on your linux terminal. It will ask you to the provide your Comet login credentials.
Welcome Mechanix V1.1
comet login: mecha
Password:
- If everything is done correctly, you should now be connected to the device via the UART cable. 🎉
Connect to Serial Console on Windows
Identify the COM Port
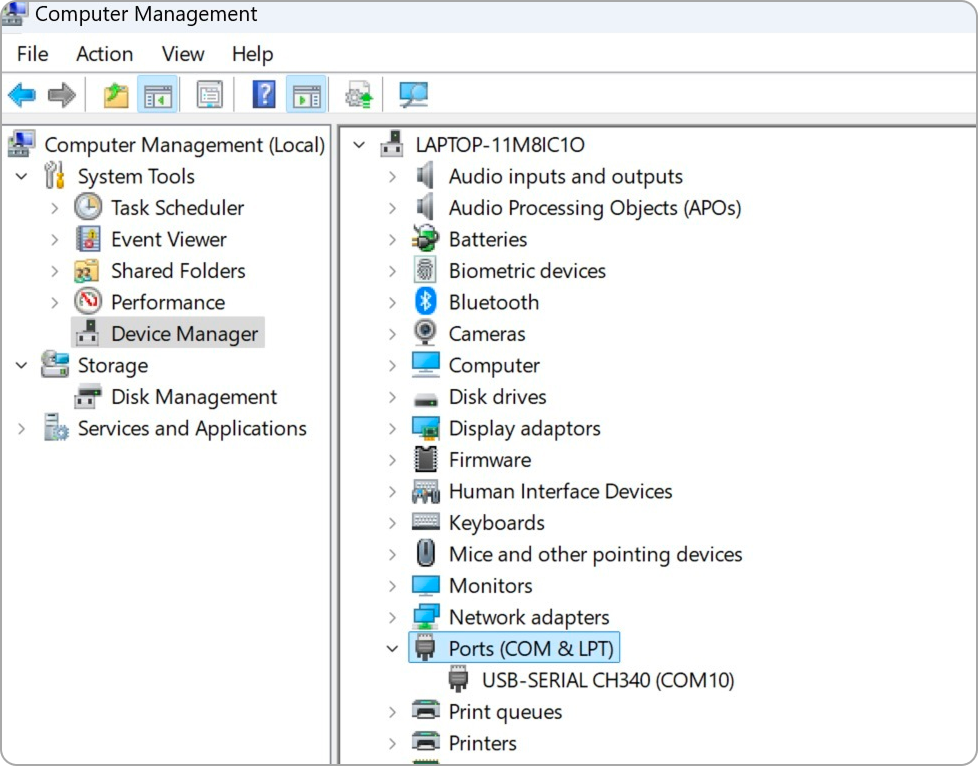
Right click on "This PC" and select Manager and then navigate to Device Manager.
Expand the Ports (COM & LPT) section. (if not visible then click view and Show hidden items from menubar).
Note the COM port number assigned to the USB-to-UART cable (e.g., COM3).
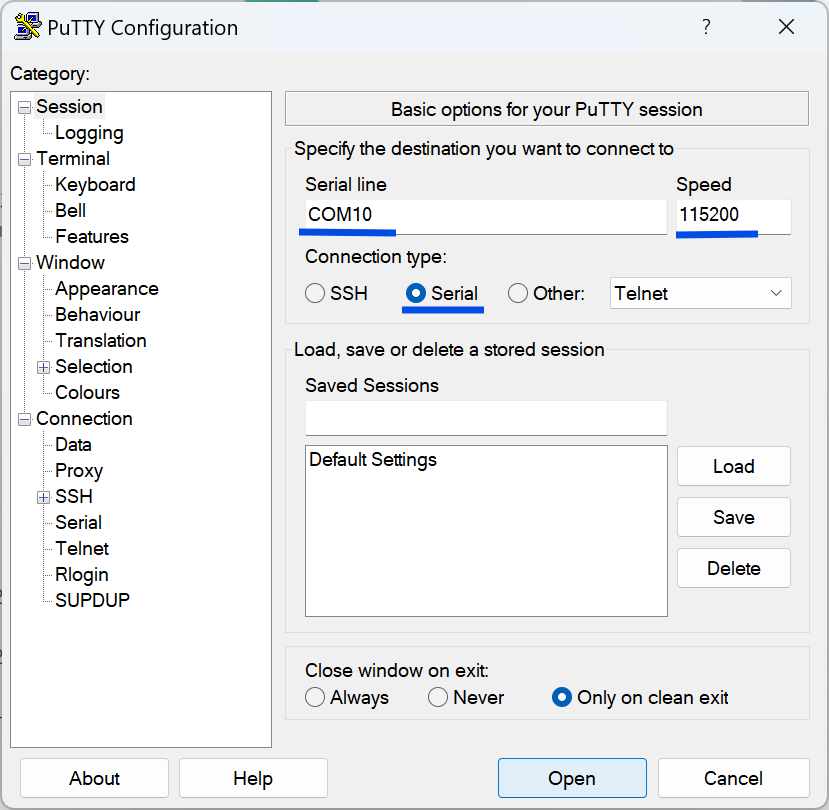
Configure and Open PuTTY
Install and Launch PuTTY (Download from here)
Under Connection Type, select Serial and enter the COM port number (e.g., COM3).
Set the Speed (baud rate) to 115200.
Once you start the Mecha Comet, you should see the boot logs on your linux terminal. It will ask you to the provide your Comet login credentials.
Welcome Mechanix V1.1
comet login: mecha
Password: