Enable Networking For Your Machine
Step 1: Initiating the Network Addition
There are two ways to start the process of adding a machine to a network:
- Via Machine Listing:
- Locate the machine in the listing and click 'Enable' under the IP address section of the machine you want to configure.
- Via Machine Details:
- Go to Settings > Networking within the machine details page and click 'Enable' to start the process.
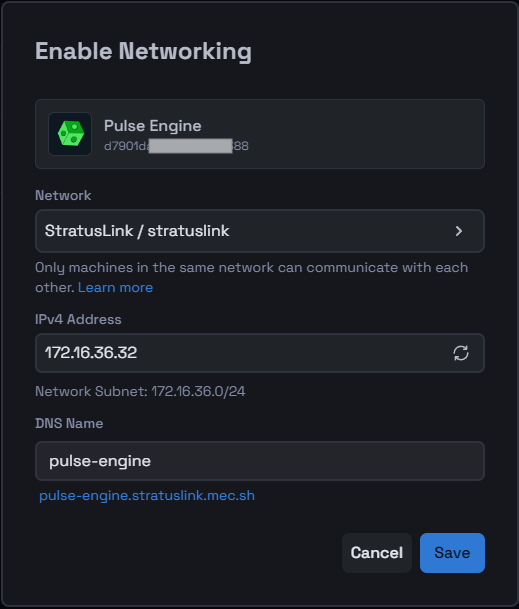
Step 2: Configure Network Settings
Once you initiate the process, a new modal will appear for configuring the network settings:
- Choose Network:
- Select the network you want to add the machine to from the dropdown list.
- Specify IPv4 Subnet Address:
- You can either accept the suggested address, generate a new one by clicking on the icon, or enter a custom IPv4 address.
- Enter the DNS Name:
- You can choose the suggested DNS name or specify one of your own.
After entering all the required information, click Save to apply the settings.
Step 3: Repeat for Additional Machines
Repeat Step 2 for each additional machine you want to connect to the network.
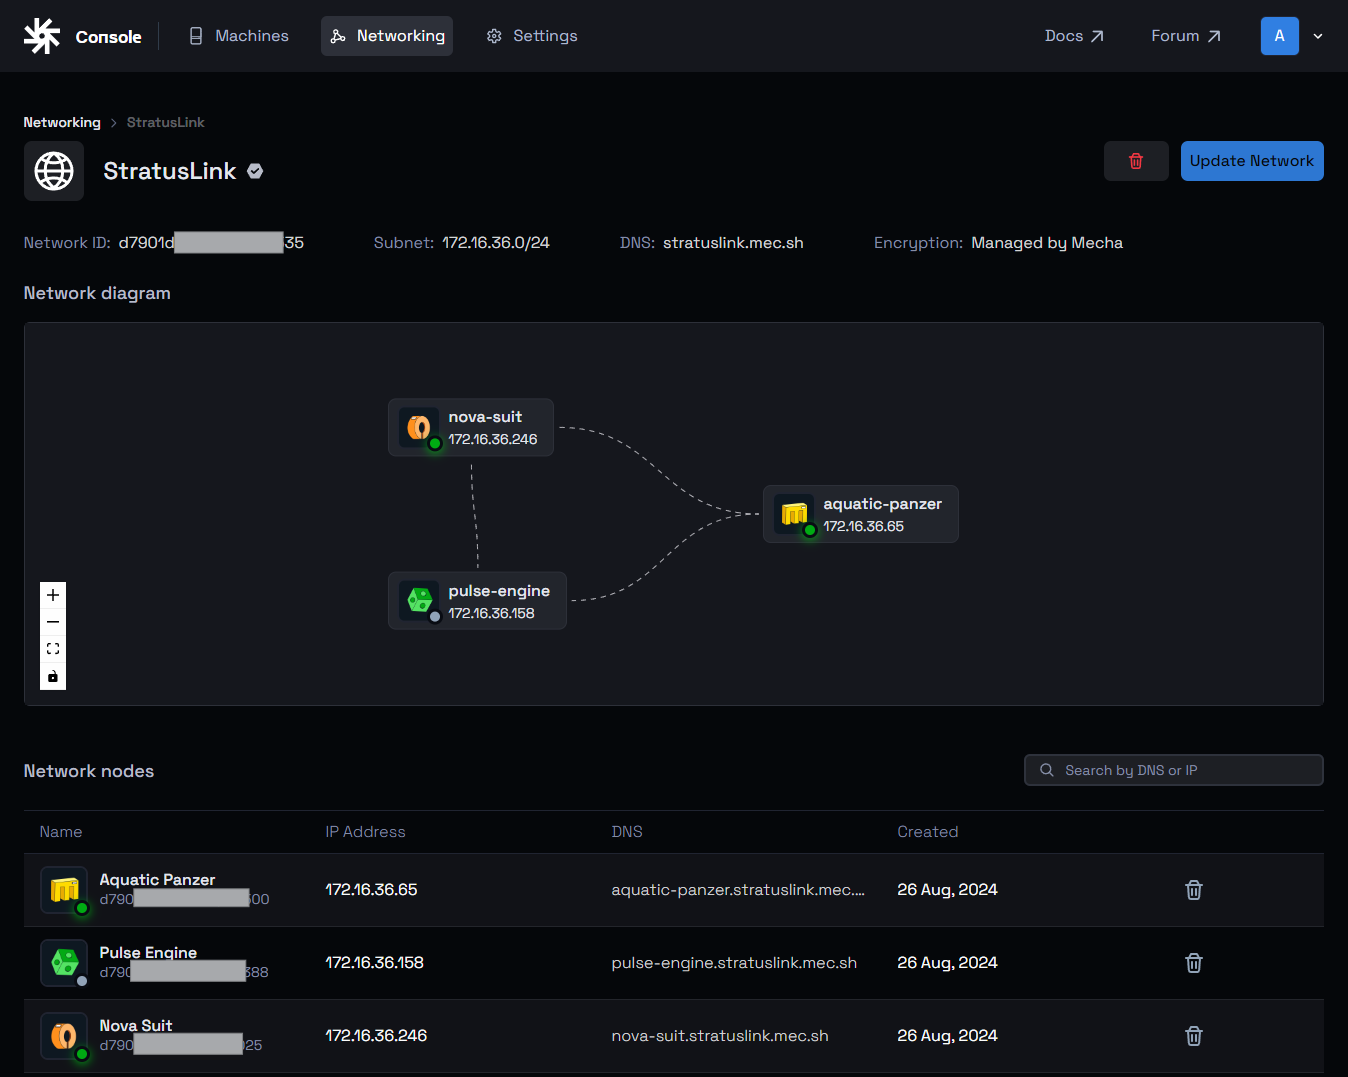
Step 4: Confirm Network Settings
After saving, you can confirm the network settings in the following ways:
- Via Machine Listing:
- Check that the IP address has been assigned to the machine as specified in the previous step.
- Via Machine Details:
- Navigate to Settings > Networking within the machine details page to see all the network details as configured.
- Via Network Details:
- Ensure that the newly added machine is listed in the network nodes table of the targeted network.
This tutorial should guide you through the process of adding a machine to a network in the Mecha Console efficiently.