Building your first mctk app
Let's create our first mctk application. In this tutorial, we are going to understand the structure of a basic mctk application while writing a simple application that displays simple text on the screen.
Note: We are assuming that you have read the setup section.
Creating a new app
Let's create a new Rust app using Cargo.
cargo new --bin hello-world-mctk
This command will create a new folder named "hello-world-mctk". There will be two important files in that folder: src/main.rs and Cargo.toml.
Adding Dependencies
Add the following code under the [dependencies] section of your Cargo.toml.
[dependencies]
mctk_core = { git="https://github.com/mecha-org/mctk", rev="3271214792f3b4f9ee149b7215b79cb9ff55849b" }
mctk_smithay = { git="https://github.com/mecha-org/mctk", rev="3271214792f3b4f9ee149b7215b79cb9ff55849b" }
mctk_macros = { git="https://github.com/mecha-org/mctk", rev="3271214792f3b4f9ee149b7215b79cb9ff55849b" }
Note: You can use the latest version of mctk by changing rev="..." to branch="dev", but doing this might result in errors as mctk is under rapid development and is subject to change.
Creating a Window
First, we have to create two structs: AppParams and App.
use mctk_core::prelude::*;

#[derive(Clone)]
struct AppParams;

#[derive(Clone, Default, Debug)]
struct App;
impl Component for App {}
impl RootComponent<AppParams> for App {
    fn root(&mut self, _window: &dyn std::any::Any, _app_params: &dyn std::any::Any) {}
}
App has implemented two traits: Component and RootComponent<AppParams>. Components are the building blocks of an mctk application, as they provide information about the layout, functionality, and state of each element.
trait RootComponent<T> needs the implementation fn root(&mut self, window: &dyn std::any::Any, params: &dyn std::any::Any);. This function is going to be called during initialization.
AppParams is going to be passed during the creation of the application, which can be accessed in the fn root(..) function.
In the main function, we need two variables to configure the window.
use mctk_smithay::{
    xdg_shell::xdg_window::{XdgWindow, XdgWindowParams},
    WindowInfo, WindowOptions,
};

fn main() {
    let window_opts = WindowOptions {
        height: 480,
        width: 480,
        scale_factor: 1.0,
    };
    let window_info = WindowInfo::default();
    // ...
}
WindowOptions is used to set the resolution of the window, and WindowInfo is used to set other parameters like title, ID, and namespace.
Finally, we call XdgWindow::open_blocking to open the window.
use mctk_smithay::{
    xdg_shell::xdg_window::{XdgWindow, XdgWindowParams},
    WindowInfo, WindowOptions,
};

fn main() {
    // ...
    let _ = XdgWindow::open_blocking::<App, AppParams>(
        XdgWindowParams {
            window_info,
            window_opts,
            ..Default::default()
        },
        AppParams,
    );
    loop {}
}
XdgWindow::open_blocking takes two parameters: XdgWindowParams, which can be used to configure the window and set up static assets, and AppParams, which is going to be passed into the fn root(..) function when the root component is being initialized.
We are adding loop {} at the end to prevent the application from closing instantly.
Running the Application
Make sure you have Sway running. You can run it with the following command:
sway &
Set the environment variable WAYLAND_DISPLAY=wayland-1:
export WAYLAND_DISPLAY=wayland-1
Then run the command:
cargo run
If the application compiles and runs successfully, you have done everything correctly. Nothing will be displayed on Sway as we haven't added any components.
Adding Components to our App
trait Component has a fn view(&self) -> Option<Node> function that optionally returns a Node. You can interpret Node as an instance of a Component which is going to have the styles and layout.
Let's add a div and simple text to our app.
impl Component for App {
    fn view(&self) -> Option<Node> {
        let mut base = node!(Div::new().bg(Color::BLACK), lay![size_pct: [100]]);
        base = base.push(node!(
            Text::new(txt!("Hello, Mecha!")).style("color", Color::WHITE)
        ));
        Some(base)
    }
}
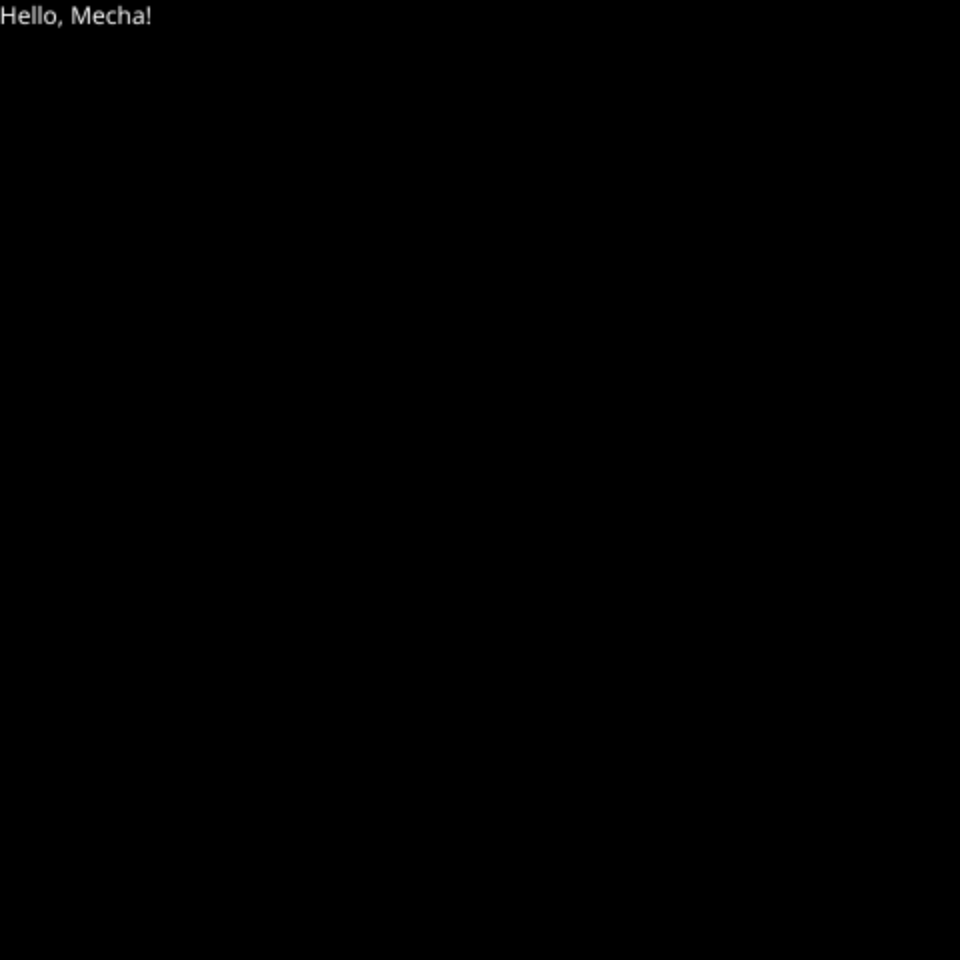
After running the app, you should see a window with a black background and text saying "Hello, Mecha!" as shown in the image below.
Congratulations, you have built your first mctk application!